Over
time, I have been gathering Internet of Things (IoT) devices that make
setting a timer for the laundry, watching TV and turning off lights a
lot easier, but also share a lot of data about my usage and much more.
Being fairly privacy conscious, it is the “much more” part that started
bothering me, especially Roku’s recently updated privacy policy that describes it is collecting my Wi-Fi network name and connection data, and information about other devices connected to the same network. I have paid full price for the Roku device so it’s not offering a free service where the user is the product.
But it is also not reasonable to remove all IoT devices and this kind
of data gathering is only going to proliferate over time, so I decided
to instead have more control over how and what data I share, by
installing PiHole. I also installed PiVPN to make my home network more
secure while accessing it from outside my home.

Equipment and Setup
This is the equipment that needed to work with my setup —
- ARRIS BGW210–700 modem + router provided by ATT
- Synology NAS DS918+ that runs my Plex Media Server
- Roku Ultra connected to the TV
- Google Home Mini
- TP-Link bulbs
I needed to buy these for my new setup —
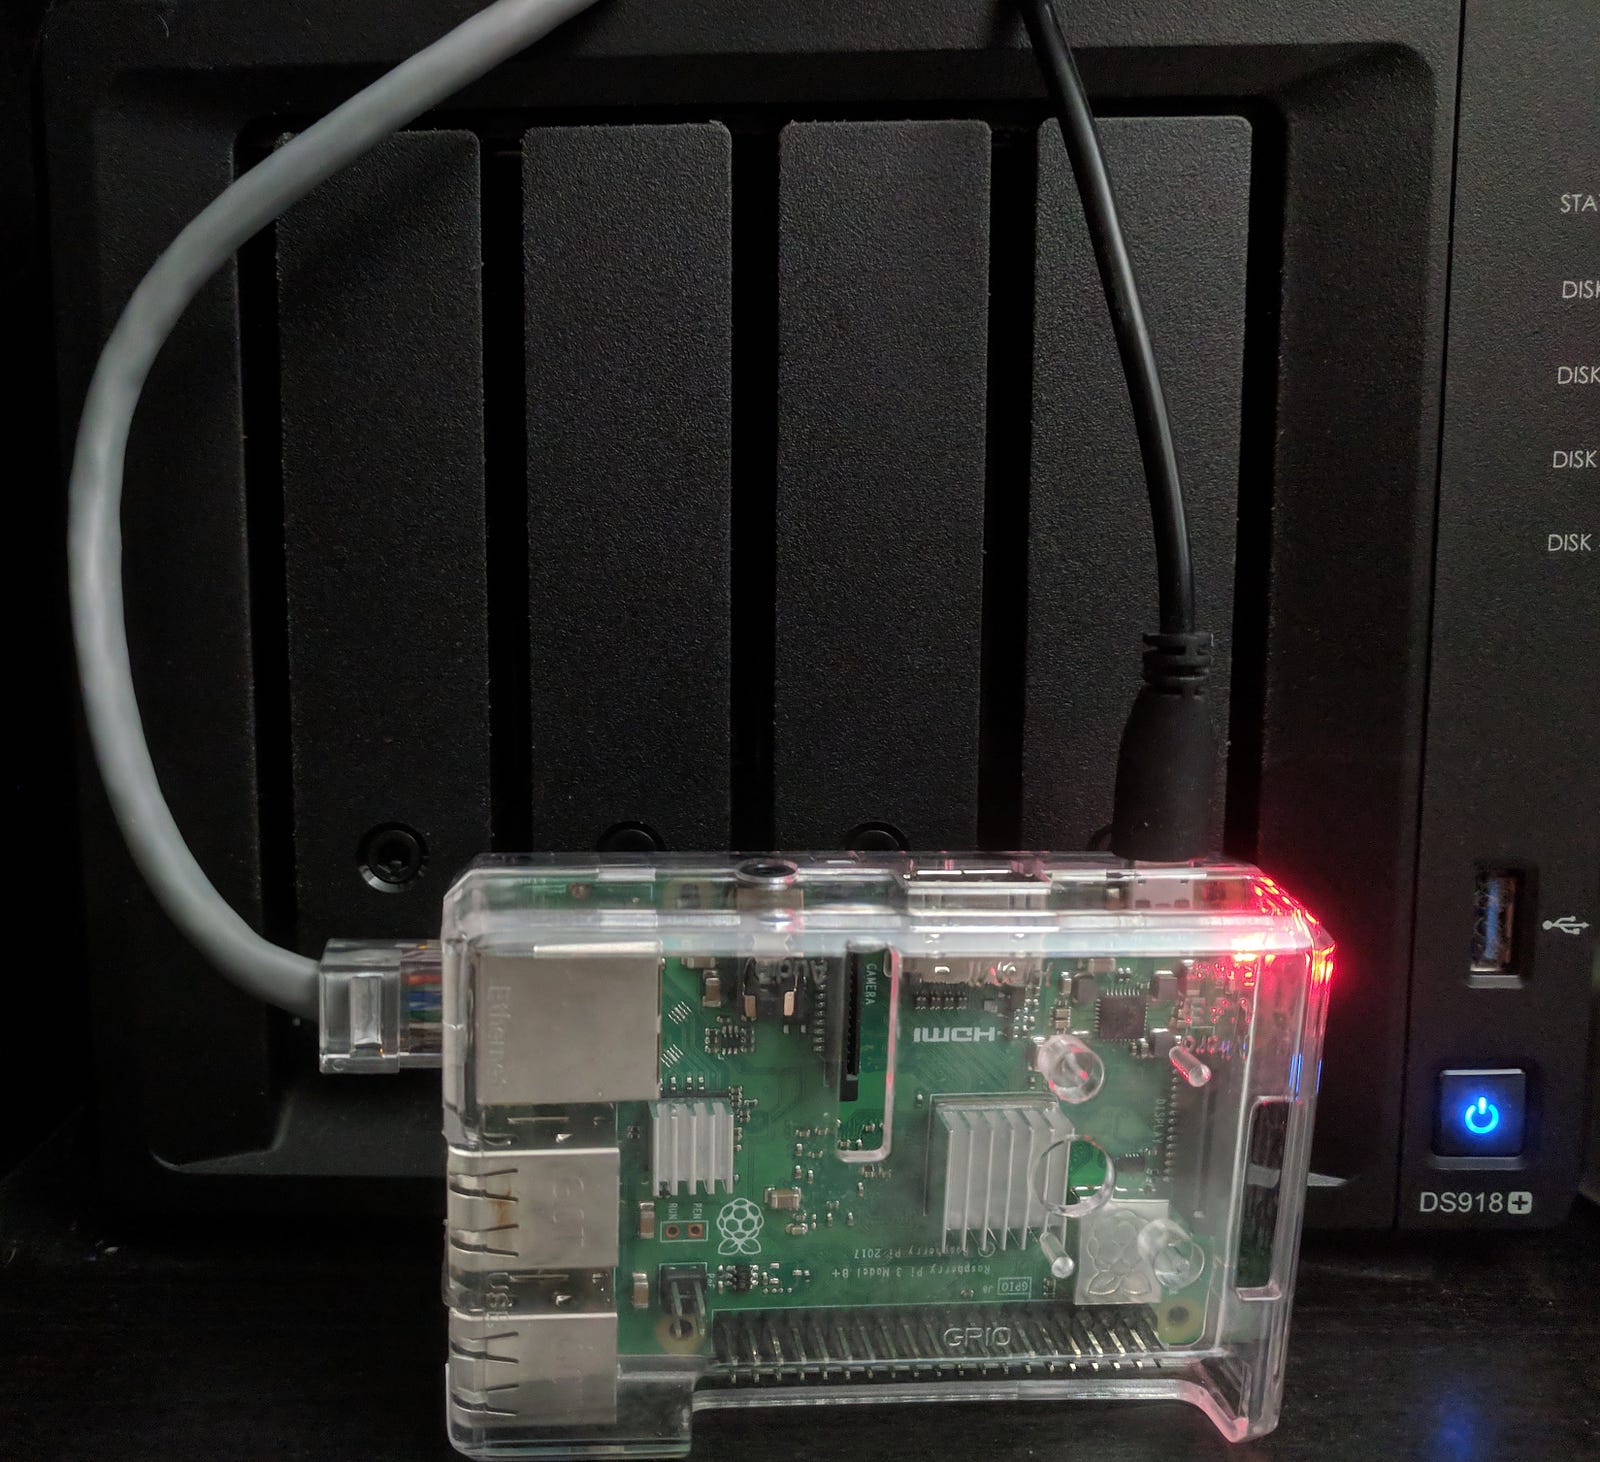
- Raspberry-Pi kit with power adapter (I bought one by V-Kits because I liked the clear cover)
- SD card (I bought Samsung 32GB EVO Plus Class 10 Micro SDHC because it was recommended online. Pi needs SDHC). If you do not have an SD card reader on your computer, you would also need a USB adapter.
Let’s
dig into the setup. I installed PiHole to blocks ads and trackers on
all devices across my entire home network. I set up PiVPN because my
Arris router does not provide a very user friendly port forwarding
interface so it’s easier to just forward one port required for VPN and
then access all my home devices through the VPN when on external
networks. It also prevents my devices from being accessed directly from
the internet, adding another layer of security. If you do not care about
accessing your devices from outside the network, you can skip the PiVPN
installation.
Installing PiHole
PiHole
developers have made its setup really easy but starting with a blank Pi
takes a few initial steps — installing an OS on your Pi like
Raspbian-lite, making sure SSH is enabled so you don’t need to connect a
keyboard and finally installing PiHole. You can either follow the
detailed instructions in Jeff Geerling article for this or I have provided the key steps below.
- Set up your Pi kit according to the kit instructions. Connect it with your router through an Ethernet cable.
- If you have a Macbook with an SD card reader, you can set up the SD card before inserting it into the Pi.
Install Raspbian-lite (the Linux-based OS for your Pi) and enable SSH usingdiskutilas shown below and described by Jeff Geerling if you have MacOS or a very similar procedure on Linux (with a slight difference only during the Raspbian installation). Do not install PiHole right now.
First download Raspbian Lite, then in Terminal on your Macbook after inserting the SD card, usediskutil listto identify SD card disk like/dev/disk2, then unmount it usingunmount/dev/disk2, and write the downloaded Raspbian image from its location likeDownloadsusingsudo dd if=raspbian-image.img of=/dev/rdisk2 bs=1mnoting the extra r in the SD card diskname. Once the image is successfully written, you will see the SD card on your Macbook as abootdrive. Enable ssh by typingtouch /Volumes/boot/ssh. - After ejecting the SD card, insert it into the Pi and power the Pi on.
- Go to your router settings and ensure that the Pi gets a static IP. I also recommend disabling IPv6 on your router since after my setup, I noticed that some of the queries were leaking through IPv6 and since it isn’t possible to fix a static IPv6 for the Pi on my router. If you disable IPv6, restart both the router and the Pi before continuing.
- Prepare the Pi for installing PiHole by connecting to your Pi using SSH from your laptop Terminal—
ssh pi@ip_address. Specify the static IP address of your Pi in the configuration file usingsudo nano /etc/dhcpcd.confand adding the following statements to the end —interface eth0
static ip_address=ip_address
static routers=router_ip
static domain_name_servers=subnet mask
For an ATT router similar to mine, the router address is192.168.1.254and subnet mask over which local IPs are allocated is192.168.1.64.
Reboot the Pi usingsudo rebootand configure it usingsudo raspi-config. Reboot again and reconnect using ssh. - Install PiHole using the step-by-step process after invoking the following command from the PiHole GitHub —
curl -sSL https://install.pi-hole.net | bash - After
the setup is complete, the PiHole needs to be activated on all devices
so they are using the PiHole DNS for web queries. If you have a router
like mine that does not allow you to change DNS, then you have to use
the DHCP approach to enable PiHole on your network. Connect to the
PiHole web dashboard from your laptop through
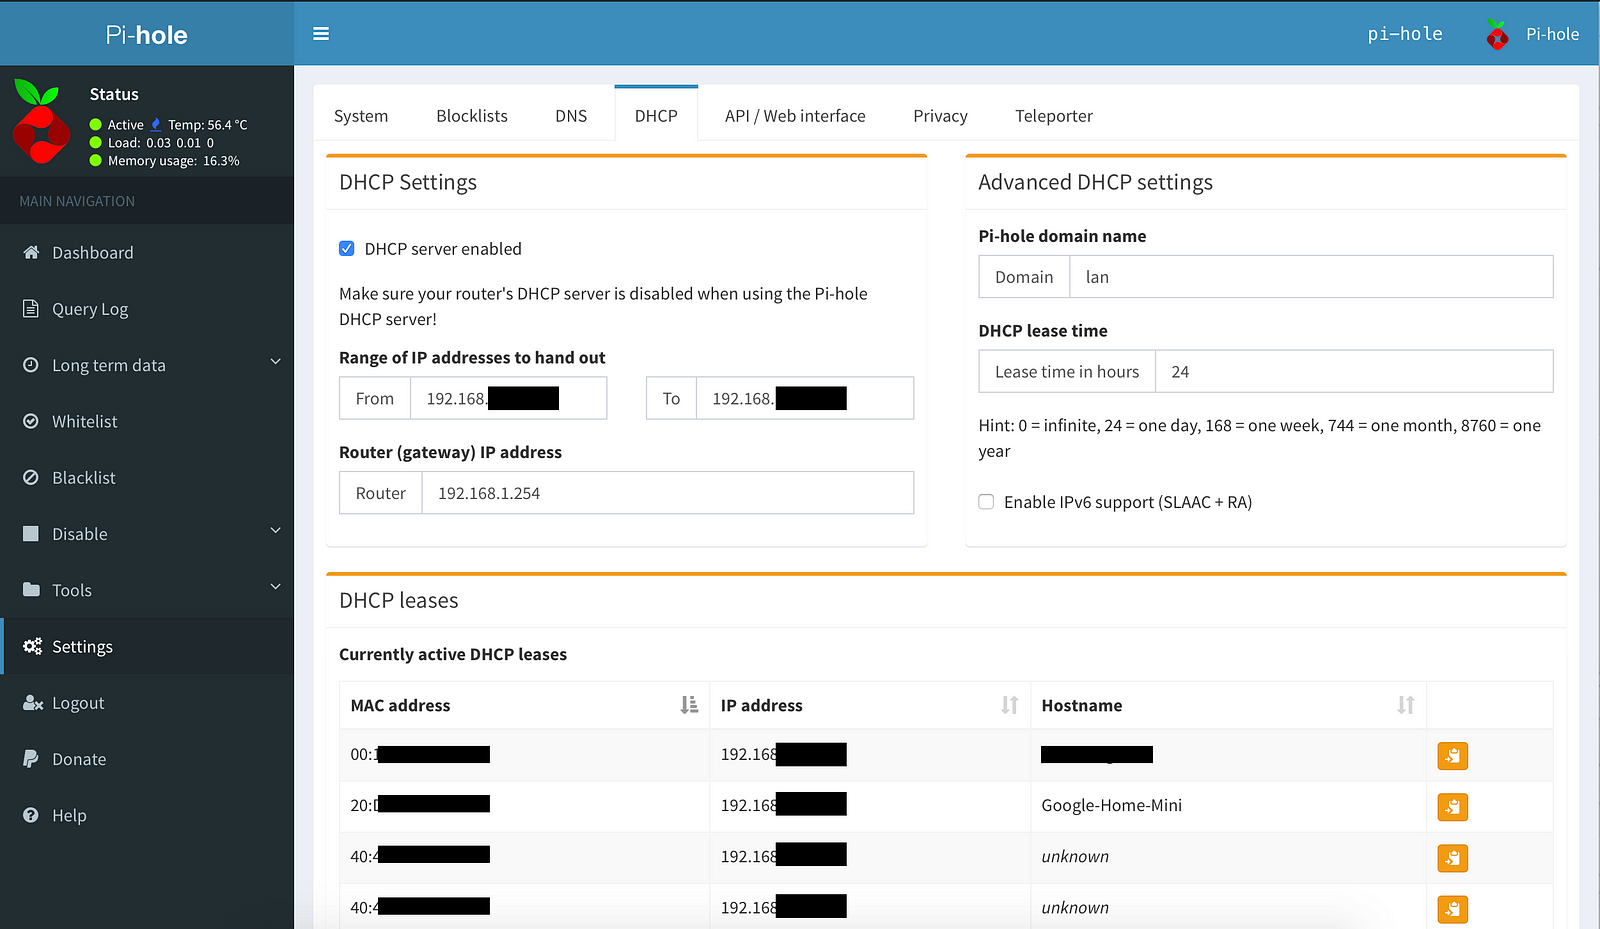
http://192.x.x.x/admin/replacing the address with your PiHole IP. In Settings → DHCP, enable DHCP server, provide the same range as your router’s DHCP and the IP address of your router. Then, go to your router settings and disable DHCP there. If you disabled IPv6 on your router, also disable IPv6 in the PiHole’s DHCP settings. - Restart your router, Pi, and all the connected devices in that order.
- All your devices should now be getting their DHCP leases from the PiHole. You can verify this by going back into the PiHole settings and ensuring all devices show on the list of DHCP leases. If you want to assign static IP to certain devices, you can do that here as well.
- Make sure your devices with an option to change DNS are using the default DNS or set their DNS to the Pi’s IP address. All your traffic should now be routing through the PiHole which is blocking all domains on its blacklist.
- If you want to go beyond the default blocklist domains, you can add more lists in Settings → Blocklists in the PiHole dashboard. WaLLy3k has a good repository of blocklists. After modifying the blocklists, either use the Save and Update option or go to Tools → Update Gravity to activate the lists.
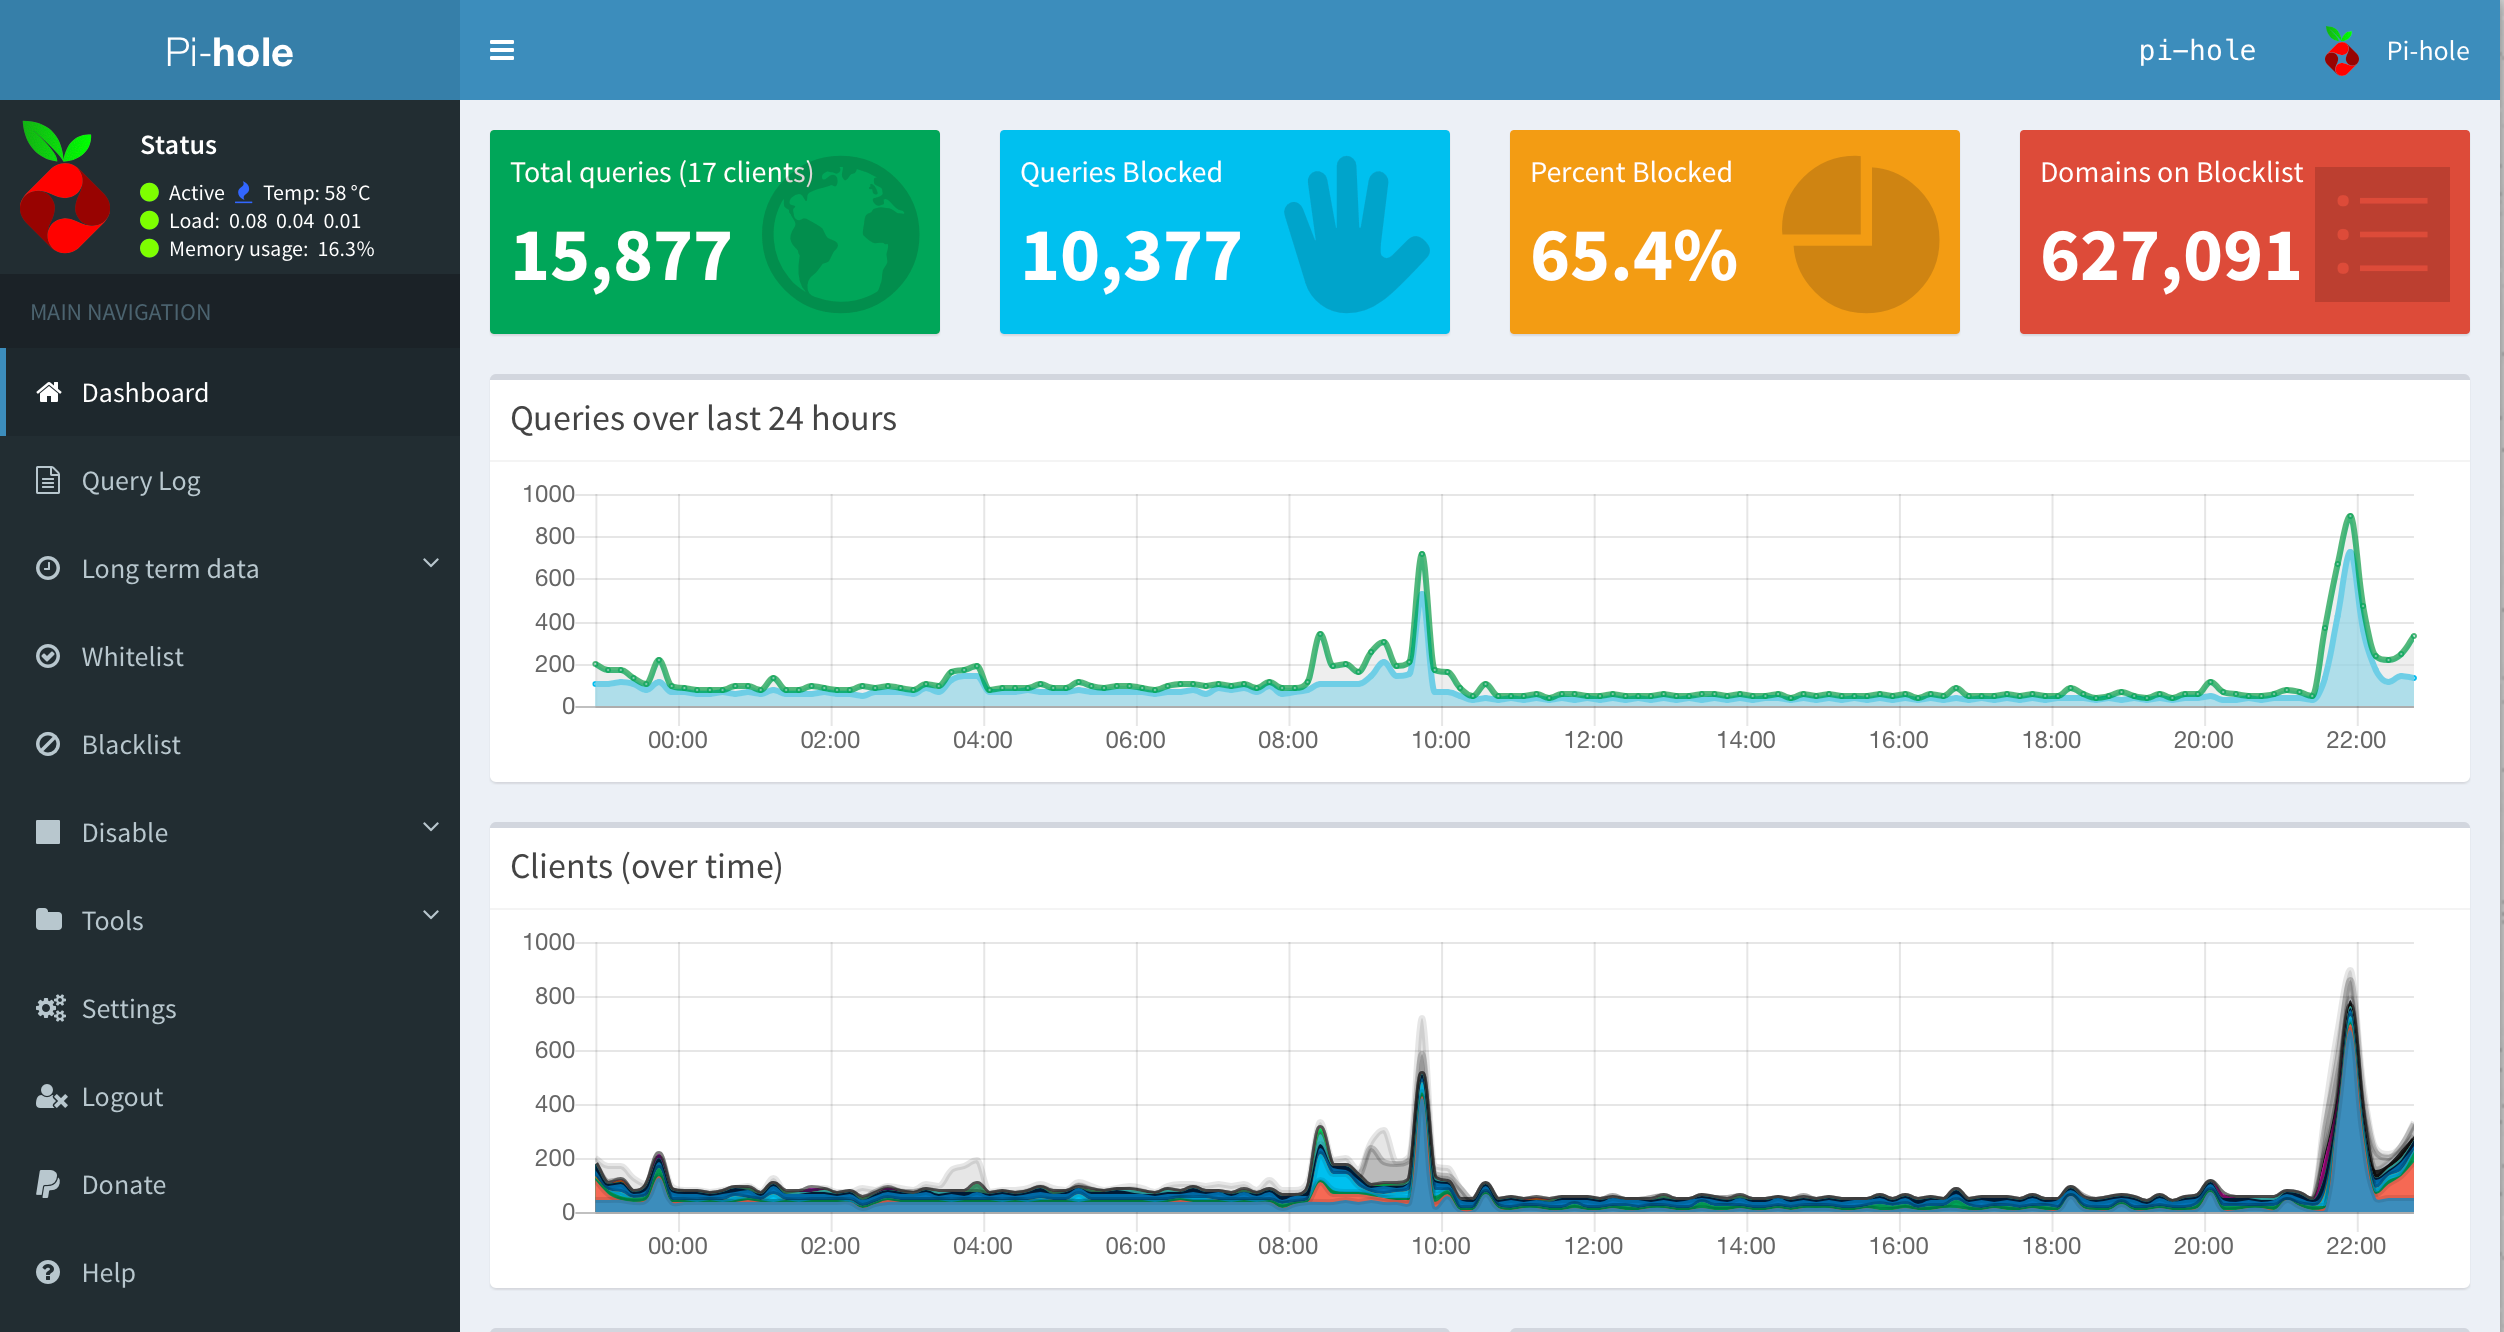
- PiHole web dashboard is your friend! Enjoy exploring all the blocked domains getting pinged every few seconds from devices that you thought were not even turned on.

Installing PiVPN
PiVPN
developers were inspired by PiHole to create an easy to setup
step-by-step installation of OpenVPN server on your Pi. A VPN would
allow you to connect to local devices on your home network from external
networks, while keeping your devices hidden from the internet. To set
up PiVPN on the same Pi as the PiHole —
- Set up port forwarding for a port that will be used for the VPN connection on your router. The default OpenVPN port is 1194 UDP, but for higher security, it’s recommended to forward a non-standard UDP port.
- I found the article by Gus on PiMyLifeUp
to be the most helpful in setting up an OpenVPN server through PiVPN on
my Pi. Make sure to use the same port during the setup as you selected
in the previous step.
After connected to the Pi through ssh, enter the following command and follow the installation steps —curl -L https://install.pivpn.io | bash
During the setup, to use the DNS I set up using PiHole when connected to the VPN, I used the Custom DNS option and entered the local IP address of my Pi. I tried using127.0.0.1as the DNS so I wouldn't have to change the OpenVPN settings if the IP address of my Pi changes, but this did not work. If you do not want to use PiHole when connected to the VPN server, you can select one of the other DNS providers from the list. You’ll still be able to connect to local devices, but internet traffic will be routed through your selected DNS. - After
the OpenVPN server is set up on your Pi, you’ll need to create VPN
clients to use on devices that you would use to connect to the VPN
server.
I created a client for my Macbook usingsudo pivpn add. To download the client on our Macbook, connect to the Pi using sftp and get the*.ovpnfile that you created.sftp pi@ip.add.re.ssget /home/pi/ovpns/yourClientName.ovpnOn my MacBook, I used Viscosity to add the ovpn connection but you can use any OpenVPN client of your choice. - After you set up a connection from your client from an outside network, you will be able to access your local devices like your NAS, backup disk, PiHole web dashboard or the Pi using SSH. However, if you access the internet, you will notice that the queries are not logged in the PiHole which means that the VPN connection is not using the PiHole for DNS even if you selected the PiHole’s DNS suring the setup. If you don’t care about using the PiHole for DNS, you are done but if you would like to use the PiHole, follow the steps in the next section.
Routing your VPN traffic through the PiHole
When connected to the VPN, if you would like to use your PiHole for DNS, you need to follow a few extra steps —
- You should have set up your DNS provider as the IP address of the PiHole during the setup of the VPN. If you didn’t, you can change it in the next step.
- I
had to combine information from multiple links to get it to
successfully work. The majority of instructions came from the last
section of the article by Marc Stan requiring me to modify
/etc/pihole/setupVars.confand add/etc/dnsmasq.d/02-ovpn.conf. In02-ovpn.conf, I added two lines unlike the original instructionsinterface=eth0
interface=tun0
Without the above modification, I was completely unable to connect to the internet on my local network or to any other devices although the connection through the VPN was working fine.
Finally, if you had not changed the DNS during setup, modify/etc/openvpn/server.confas described in Marc’s article. - Some links refer to PIVPN’s official FAQ
for setting up PiVPN with PiHole. However, when I implemented this, I
was both unable to get VPN traffic routed through PiHole and was getting
query leaks even when connected on local network. I would recommend not
changing the
/etc/dnsmasq.confas suggested in the FAQ.
To
test if everything is working as intended, look for queries from your
connected devices on the PiHole web dashboard when connected on the
local network, or from the VPN clients (generally shown as
10.0.8.x) when connected to the OpenVPN server from an external network.
After
this setup, I was able to shut down my previously forwarded ports that I
was using to connect to my NAS and to access Plex because I only need
to forward my VPN port and connect to the VPN for full access to any of
the local devices from anywhere in the world!
Side note if you have TP-Link bulbs with a Google Home
I realized that I could successfully blacklist
devs.tplinkcloud.com
that my TP-link bulbs are pinging every few seconds, except if I
disconnected my bulbs and reconnected them, I was not able to control
them through the Google Home, though I could still control them from the
Kasa app. To fix this, I disabled the PiHole from its web dashboard for
a few seconds and disconnected and reconnected the bulbs. When the bulb
restarts, it sends a few queries that are not blocked on the disabled
PiHole. After you see these queries, you can re-enable the PiHole as
this registration only needs to happen once after a bulb restart.
After
my PiHole setup was complete, I started noticing the extent of queries
being sent out by my home devices. When using Roku, it send out over
7000 queries in 2 hours, roughly a query every second. Each of the
TP-link bulbs query every few minutes. If apps are running in the
background on Android, they will keep sending frequent queries even
after I have stopped using them. I hope that as the discord around
privacy increases, companies would start providing users more control
over how they share their data, but until then, I am glad that
developers have developed tools like PiHole and PiVPN to empower the
daily user to control how and what data is gathered.
Fonte: https://medium.com/@timebarrier/setting-up-pihole-and-pivpn-for-privacy-and-security-in-the-iot-era-613dbbb29584
Fonte: https://medium.com/@timebarrier/setting-up-pihole-and-pivpn-for-privacy-and-security-in-the-iot-era-613dbbb29584