sudo apt-get install language-pack-gnome-pt language-pack-pt-base
dpkg-reconfigure -f noninteractive locales
sudo apt-get install language-pack-gnome-pt language-pack-pt-base
https://download.argon40.com/argon1.sh | bash
Como instalar Samba com Webmin no Ubuntu Server 20.04 - VMIA BLOG
Neste post iremos demonstrar a instalação do Samba (compartilhamento de arquivo) com Webmin (Interface de configuração de diversos servidores) no Linux Ubuntu Server 20.04 sem interface gráfica.
Os servidores Linux são muito bons em segurança e desempenho, a instalação do Ubuntu Server 20.04 tem somente 900MB. E pode ser executado em diversos computadores e máquina virtual. Não exige muito hardware.
O Samba é um ótimo programa para compartilhar arquivo no Linux que simula um servidor Windows e pode ser acessado por todos os sistemas operacionais. O Webmin é uma interface web que facilita a administração de diversos programas Linux, ao invés de ser administrador pela linha de comando uma interface visual ajuda muito.
sudo apt install tasksel
sudo tasksel install samba-server

sudo cp /etc/samba/smb.conf /etc/samba/smb.conf_backup
sudo bash -c ‘grep -v -E “^#|^;” /etc/samba/smb.conf_backup | grep . > /etc/samba/smb.conf’
sudo smbpasswd -a vmia

sudo mkdir /var/smb
sudo chmod 777 /var/smb/
sudo nano /etc/samba/smb.conf
/***********************************************************************
[homes]
comment = Diretorio do Usuario
browseable = yes
read only = no
create mask = 0700
directory mask = 0700
valid users = %S
[public]
comment = Acesso publico
path = /var/smb/
browsable =yes
create mask = 0660
directory mask = 0771
writable = yes
guest ok = yes
**********************************************************************/

sudo systemctl restart smbd
Após o procedimento acima você já pode acessar os dois compartilhamentos criados.

How To Automount File Systems on Linux - LinuxBabe
Today I’m going to show you how to automatically mount a drive at boot time in Linux. My laptop have one SSD and one mechanical drive. I install operating systems on SSD and store files on mechanical drive. So often times I need to mount the mechanical drive in file manager manually to access my mp3 and video files. Mounting drive manually is just a waste of time. So I’m going to show you an easy way to automount drive in Linux.
Open your terminal, run the following command to see the name of your drive, its UUID(Universal Unique Identifier) and file system type.
sudo blkid
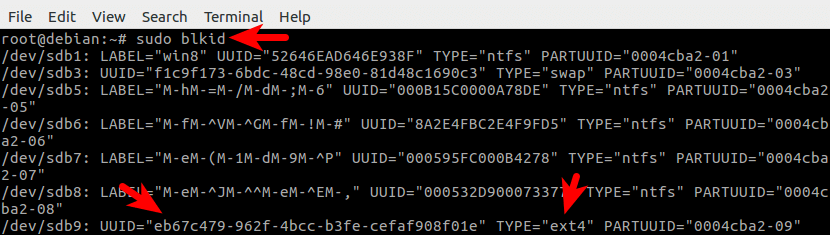
In the output of this command, the first column is the name of your drives. The second column is the label of the drive (if you set a label for it) and the third column is the UUID of your drives.
First you need to know the name of the drive that is going to be automatically mounted. For example, the name of the drive that is going to be automatically mounted on my computer is /dev/sdb9.
Then you need to know it’s UUID and file system type. As you can see the UUID of /dev/sdb9 is eb67c479-962f-4bcc-b3fe-cefaf908f01e and the file system of /dev/sdb9 is ext4 which is the standard file system in Linux.
We are going to make a mount point under /mnt directory. Enter the following command,
sudo mkdir /mnt/<name-of-the-drive>
For example, I issued the following command:
sudo mkdir /mnt/sdb9
Run the following command to edit the /etc/fstab file. Nano is a command line editor on Linux.
sudo nano /etc/fstab
We need to append one line of code at the end of the file. The format of this line of code is as follows:
UUID=<uuid-of-your-drive> <mount-point> <file-system-type> <mount-option> <dump> <pass>
Note that you need to separate these items with Tab key. For example, I added the following line to the end of /etc/fstab.
UUID=eb67c479-962f-4bcc-b3fe-cefaf908f01e /mnt/sdb9 ext4 defaults 0 2

If you want to automount a NTFS file system, here is an example.
UUID=<uuid-of-ntfs-file-system> /mnt/ntfs ntfs defaults 0 2
Save and close the file. Then run the following command to see if it works.
sudo mount -a
So that’s how you automount a file system in Linux.
For swap partitions, the mount point field should be specified as none.
The defaults mount option will give users read and write access to the file system.
The value of dump field is usually zero.
The pass field is used by the fsck program to determine the order in which filesystem checks are done at reboot time. As you can see in this file, the value of the pass field for the root file system is 1. Swap partitions do not need to be checked and the value for them is zero. All other file systems should have a value of 2. So I set the pass value as 2 for my drive.
Fonte: How to Install qBittorrent on Ubuntu 18.04 Desktop or Server (linuxbabe.com)
ou can install qBittorrent command line client on a headless Ubuntu 18.04 server and manage it via the qBittorrent web interface (You control it in a web browser). SSH into your Ubuntu 18.04 server and use the same PPA to install qBittorrent daemon.
sudo add-apt-repository ppa:qbittorrent-team/qbittorrent-stable

sudo apt install qbittorrent-nox
Note that we need to install qbittorrent-nox (without X), instead of qbittorrent. qBittorrent-nox is meant to be controlled via its feature-rich Web UI which is accessible as a default on http://localhost:8080. The Web UI access is secured and the default account username is “admin” with “adminadmin” as a password. You can start qBitorrent-nox with:
qbittorrent-nox
However, starting qBittorrent-nox this way isn’t recommended, because you can’t run other command while it’s running. Press Ctrl+C to quit it now. We can create a systemd service unit so it can run in the background and also start at system boot time.
Create the qbittorrent-nox user and group so that it can run as an unprivileged user, which will increase your server’s security.
sudo adduser --system --group qbittorrent-nox
The --system flag means we are creating a system user instead of normal user. A system user doesn’t have password and can’t login, which is what you would want for a torrent client. A home directory /home/qbittorent-nox will be created for this user. You might want to add your user account to group qbittorrent-nox with the following command so that the user account has access to the files downloaded by qBittorrent-nox. Files are downloaded to /home/qbittorrent-nox/Downloads/ by default. Note that you need to re-login for the groups change to take effect.
sudo adduser your-username qbittorrent-noxThen create a systemd service file for qbittorrent-nox with your favourite text editor such as nano.
sudo nano /etc/systemd/system/qbittorrent-nox.service
Copy and paste the following lines into the file. If there’s another service using port 8080, then you need to change the port number for qBitorrent to something else like 8081. Also note that the -d (daemonize) option is needed in this systemd service unit.
[Unit]
Description=qBittorrent Command Line Client
After=network.target

[Service]
#Do not change to "simple"
Type=forking
User=qbittorrent-nox
Group=qbittorrent-nox
UMask=007
ExecStart=/usr/bin/qbittorrent-nox -d --webui-port=8080
Restart=on-failure

[Install]
WantedBy=multi-user.target
To save a file in Nano text editor, press Ctrl+O, then press Enter to confirm. Press Ctrl+X to exit. Now start qBittorrent-nox with the following command.
sudo systemctl start qbittorrent-nox
Note that if you change a systemd service file, you need to reload the systemd daemon for the change to take effect.
sudo systemctl daemon-reload
You might also want to enable auto start at system boot time.
sudo systemctl enable qbittorrent-nox
Check its status:
systemctl status qbittorrent-nox
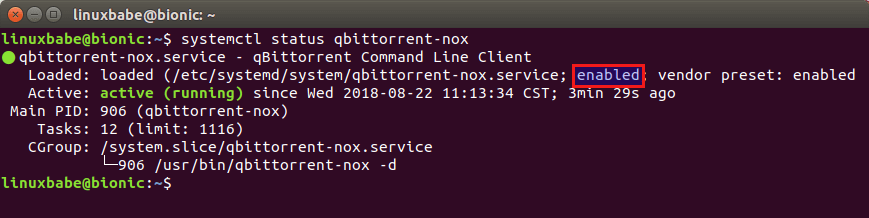
You can see that qBittorrent-nox is running and auto start at boot time is enabled.
To access the qBittorrent Web UI from local network, enter the Ubuntu server’s private IP address followed by the port number like below.
192.168.0.102:8080
Username is admin. Default password is “adminadmin”.
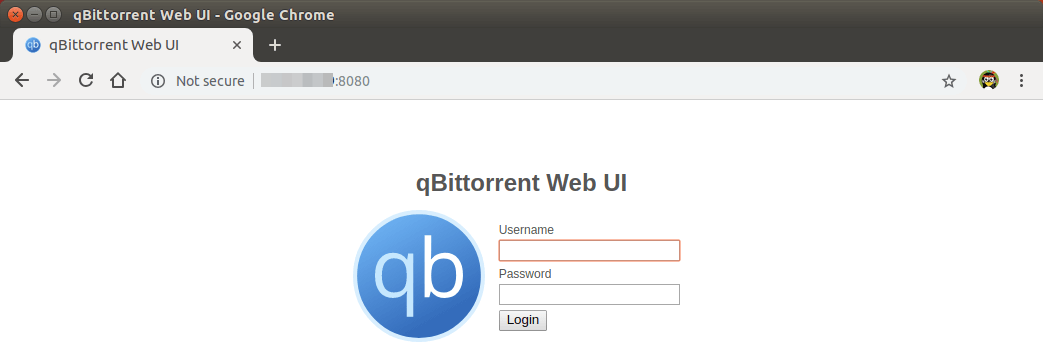
The default web interface.
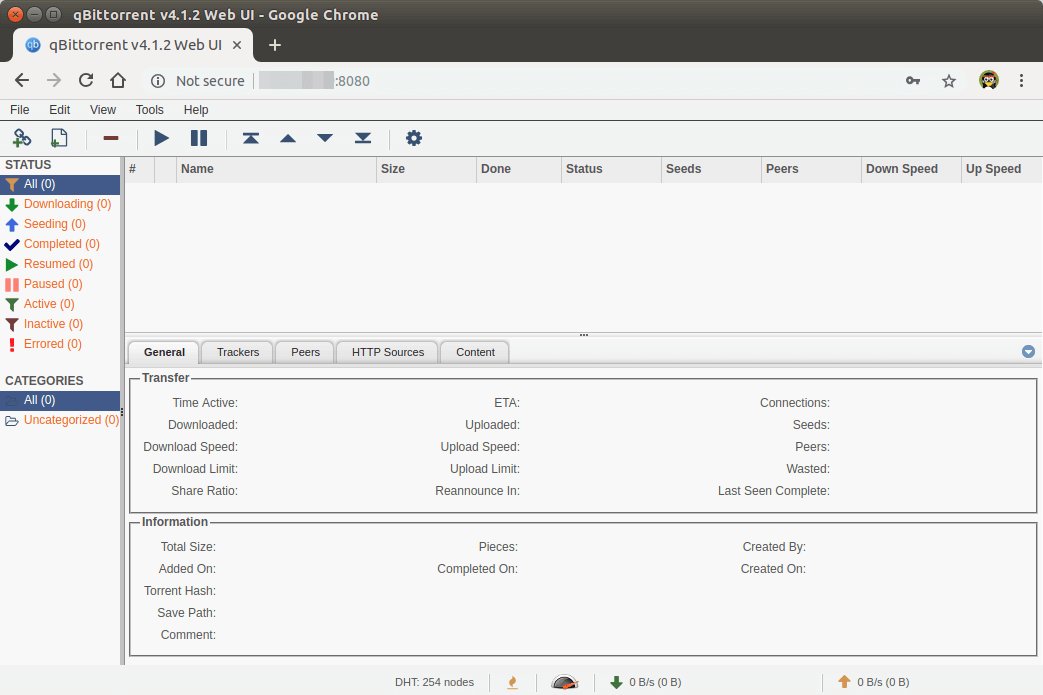
It’s strongly recommended to change the default username and password. Go to Tools > Options and select the Web UI tab. Under the Authentication section, change both username and password.
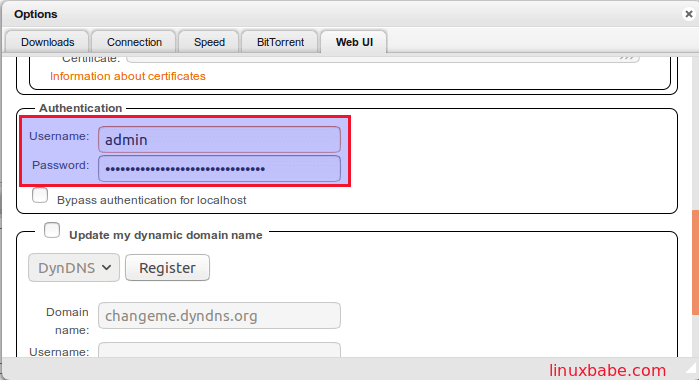
And now you can start downloading torrents on your Ubuntu 18.04 server. You have the option to upload local torrents or add magnet links. Files are downloaded to /home/qbittorrent-nox/Downloads/ by default.
GtkDialog (ou gtkdialog) é um pequeno utilitário para fácil e rápida construção de interfaces gráficas. Ele pode ser usado para criar caixas de diálogo para quase todas as linguagens de programação interpretadas e compiladas, o que é uma característica muito atraente, pois o desenvolvedor não tem que aprender várias bibliotecas gráficas para cada linguagem de programação que utilizar. Neste artigo, saiba como criar aplicações gráficas com ShellScript e GTKDialog.
Para compilar execute os comandos abaixo:
Vamos criar uma pequena aplicação gráfica utilizando GtkDialog + ShellScript:
#!/bin/bash
export MAIN_DIALOG='
<window title="Meu primeiro programa" icon-name="gtk-about" resizable="true" width-request="300" height-request="100">
<vbox>
  <hbox homogeneous="true">
    <frame Executar programa>
      <hbox homogeneous="false" space-expand="true" space-fill="true">
        <entry>
          <variable>ENTRY</variable>
          <action signal="activate">$ENTRY</action>
          <action signal="activate" type="exit">EXIT</action>
        </entry>
        <button>
          <label>Executar</label>
          <action type="command">$ENTRY</action>
          <action function="exit">EXIT</action>
        </button>
      </hbox>
    </frame>
  </hbox>
</vbox>
</window>'
case $1 in
  -d | --dump) echo "$MAIN_DIALOG" ;;
  *) gtkdialog --program=MAIN_DIALOG --center ;;
esac
OBSERVAÇÃO: A sintaxe para criação da interface segue o padrão XML, portanto as TAGS devem ser abertas e fechadas corretamente.
As possibilidades são imensas, você pode fazer desde aplicações gráficas simples, até mais avançadas como um player de música, um editor de textos, e assim por diante. Segue também página com diversos exemplos de aplicações com GtkDialog:
Tutoriais para uso no Raspberry Pi 3 B © 2011 DheTemplate.com. Supported by Tips for Life and Blogging Tips